Painting Mode Guide
With UModeler X's Painting Mode, you can experience near-perfect painting features, from adjusting brush properties to editing layers and even mask effects. Paint directly on 3D models and check the results in real time. Now, you can also create textures directly in Unity.
Key Features
A texture is an image used to express the details of a 3D model's surface. Textures can be applied to the whole or specific parts of a model through materials, and they are assigned to the model through the process of allocating materials.
UModeler X allows you to create such textures directly through its built-in paint mode, and the key features are as follows
Supports both 3D Scene View and 2D Editor
The painting mode of UModeler X is specially designed to help quickly and easily edit textures in both the 2D editor and 3D scene view.
Layer-Based Painting
When painting colors, you can proceed by dividing the process into layers, such as sketching and coloring. There are transparent layers and layers that are already painted. Layers cannot affect other layers, but they influence the color of the model as they overlap. When layers overlap, you can set how they will overlap. You can set modes such as becoming brighter as they overlap and becoming darker as they overlap, which are called layer blending modes.
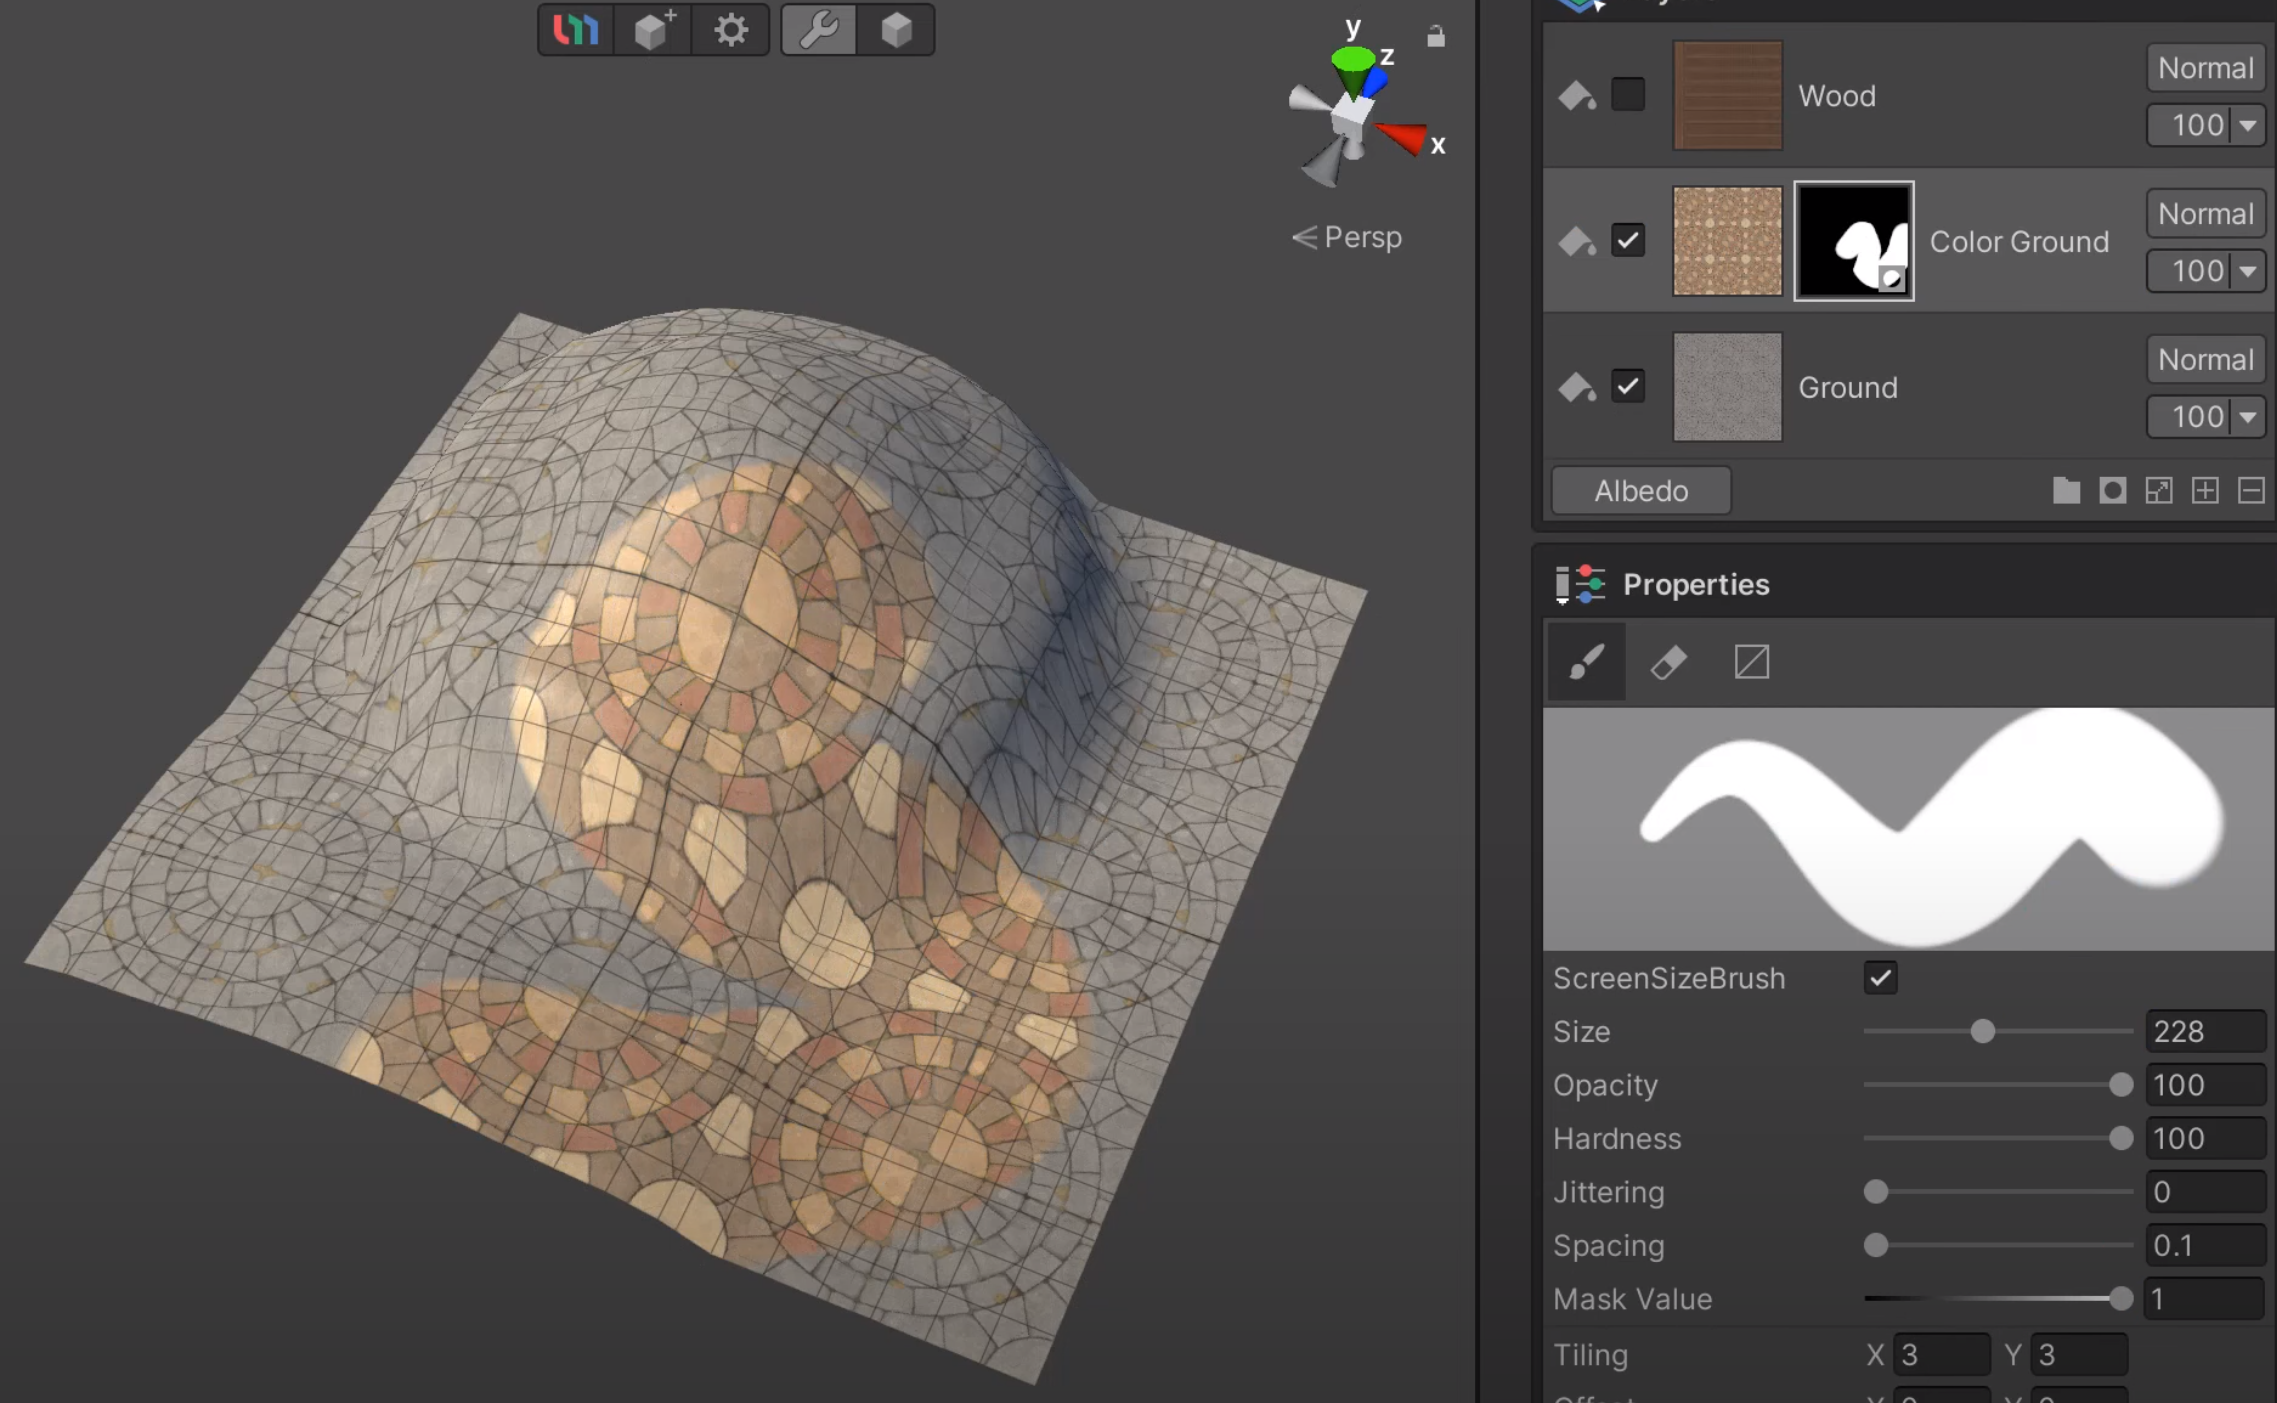
Supports Paint, Fill, Sticker, and Mask Layers
It supports the Paint layer for direct coloring with a brush, the Fill layer for covering the entire model, the Sticker layer for attaching images like stickers to the surface, and the Mask layer that can be used with these layers, allowing for a rich painting effect.
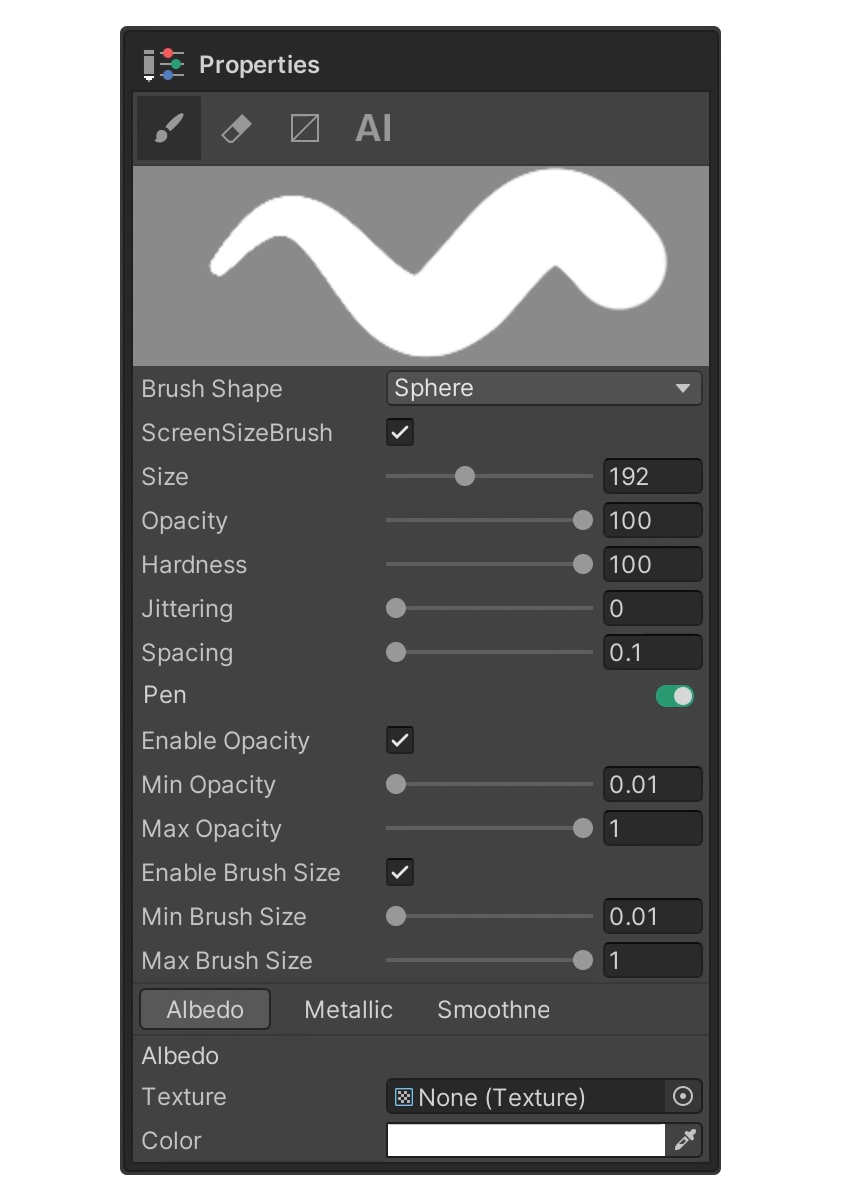
Supports Brush Pressure
Supports brush pressure sensitivity, allowing you to draw natural and expressive strokes based on pen pressure when using a tablet.
Supports Various Material Expressions
Through the Map Source, it is possible to paint not only colors but also various materials such as metallicity, shading, and roughness etc,. This allows you to paint the smoothness and roughness, and you can make it shine by painting glowing colors.
Color Channel Customizing Feature
Textures use RGB channels to represent colors, with an additional value (Alpha) for transparency. Various colors are created by the intensity of each channel and combined into a single texture. The created texture is applied to the material and used as the model's color through the shader. The painting mode of UModeler X also supports the ability to edit these color values separately by channel, allowing for a variety of effects with a smaller number of textures.
AI Texturing Feature
If you connect UModeler X with a computer where Stable Diffusion WebUI is installed, you can directly map AI-generated images onto 3D models placed in the scene view based on prompts, the depth map and the input image created in the scene view. Moreover, you can easily and quickly obtain the desired results by incorporating AI-generated images with the layers in the painting mode.
Starting Painting Mode
Prepare an Editable Mesh model.
- Create a 3D model through the modeling mode of UModeler X, or convert an already created 3D mesh into an Editable Mesh using UModelerize.
Select the Painting 3D tab.
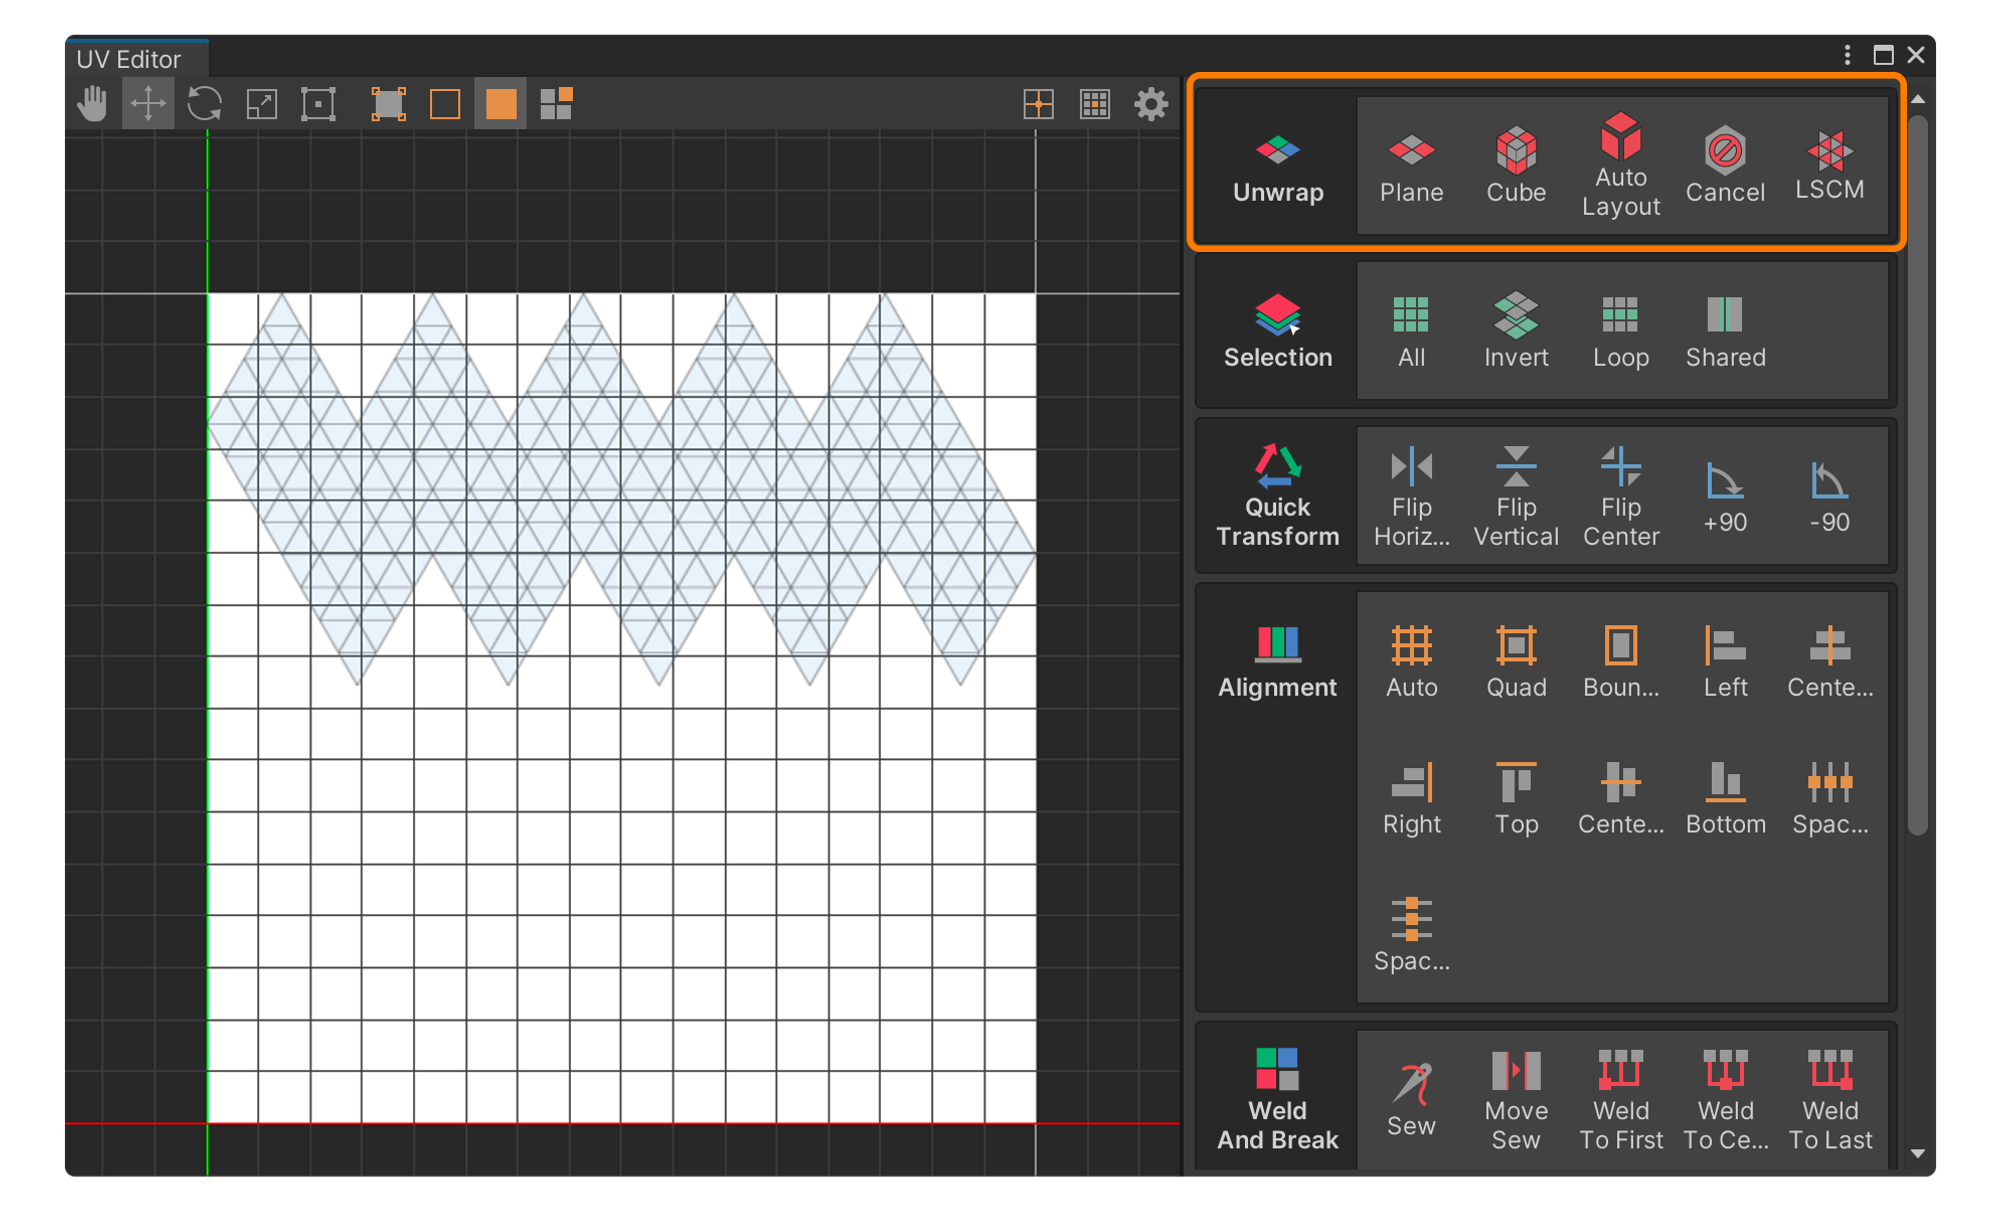
If it is not unwrapped, perform unwrapping to generate UV coordinates.
UV Coordinates In 3D modeling, UV coordinates are used to map a 2D texture onto the surface of a 3D object. Here,
UandVrepresent the axes of the 2D texture space, linking each point of the 3D model to a specific location on the texture. Through this mapping, detailed images, patterns, or colors can be accurately applied to the surface of the 3D model. Since UV coordinates align every point of the 3D model with the correct position on the texture, it is necessary to generate UV coordinates in advance through the unwrapping function so that the colors painted in painting mode are recorded on the texture.To start painting, at least one of the model's faces must be unfolded into UV coordinates using the tools in the unwrap group within the UV Editor.
 Also, for basic shapes, please check if the Auto Unwrap Shape property is activated in the Preference window. If this property is activated, UVs are already created when the basic shape is generated, allowing you to start painting immediately without the need for separate unwrapping work.

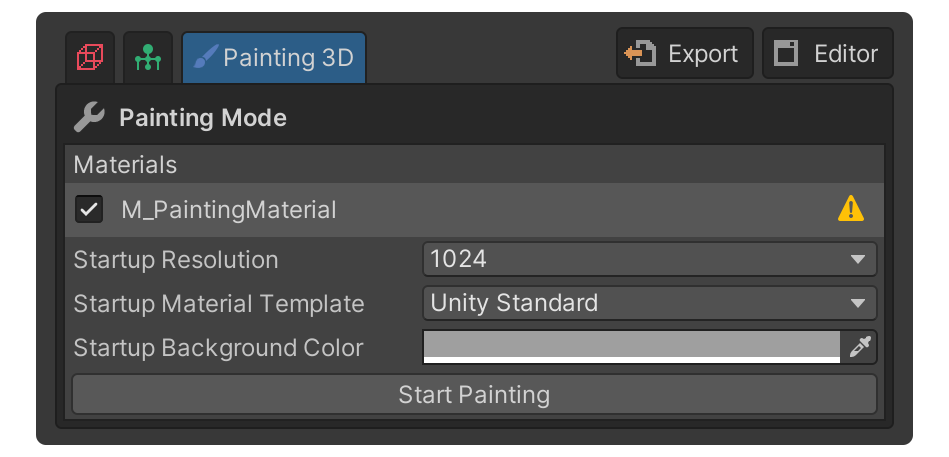
Specify the properties for the material to be painted on.
- Startup Resolution : This property allows you to select the texture resolution for painting. It can be changed during painting.
- Startup Material Template : This property sets the predefined map source that will be used for painting.
- Startup Background Color : This property sets the background color that will be the base during painting. It can be changed during painting.
Click Start Painting and begin painting
Using Pen Pressure Sensitivity
To apply pen pressure sensitivity to the brush, follow the steps below.
- Connect the tablet to your PC.
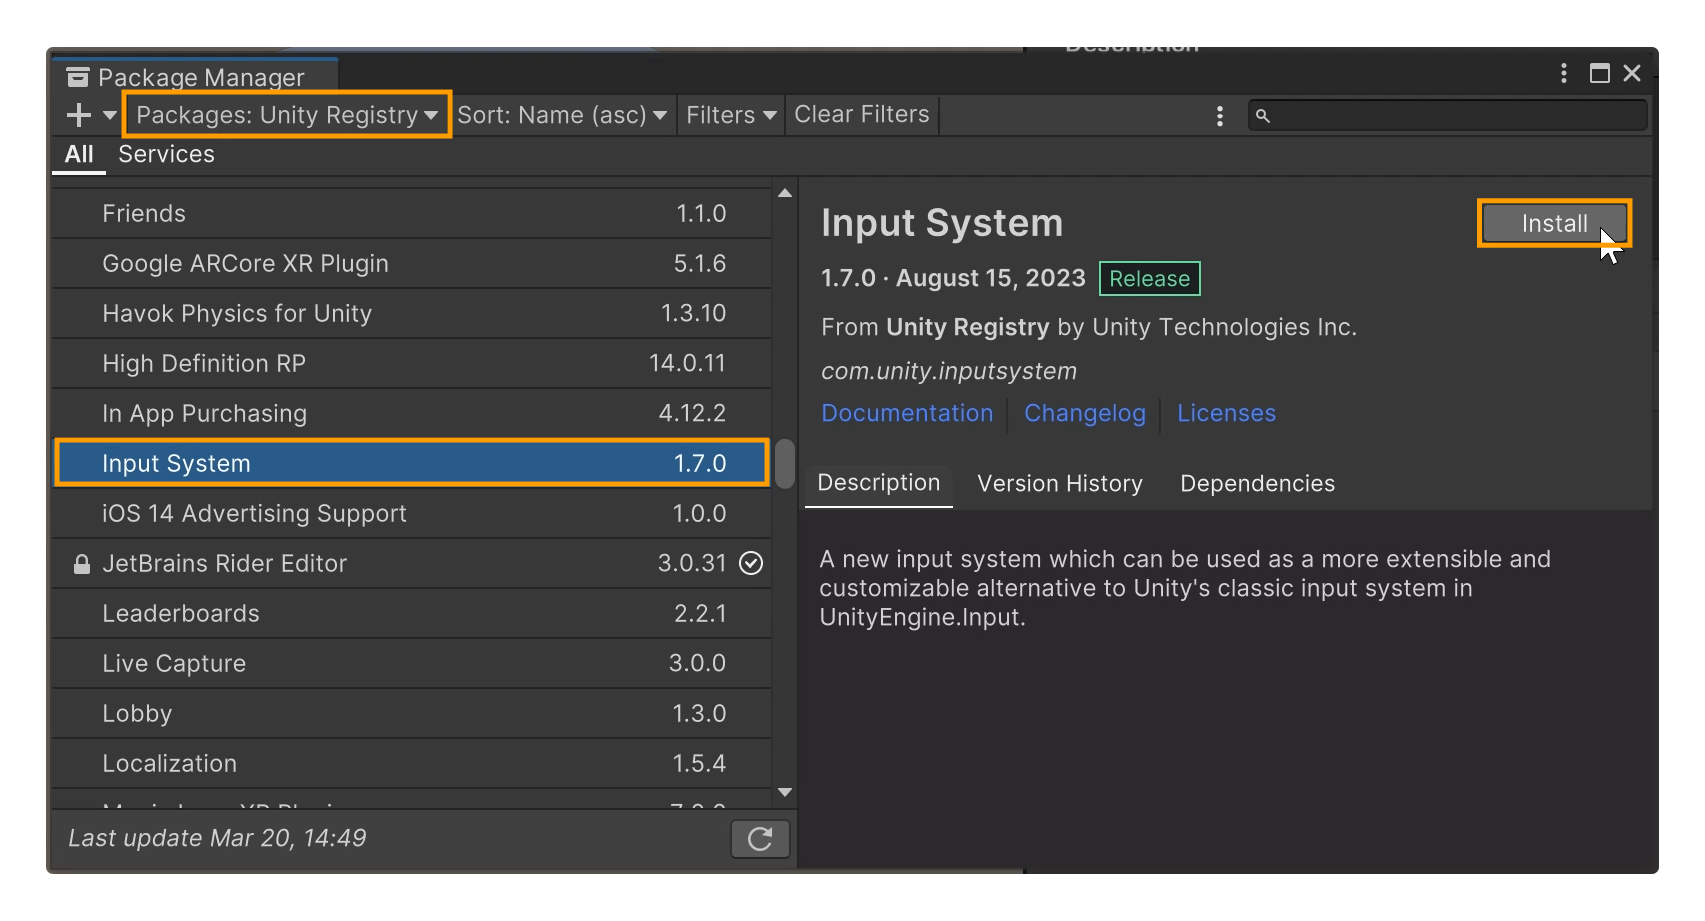
- Click Window > Package Manager from the top menu.
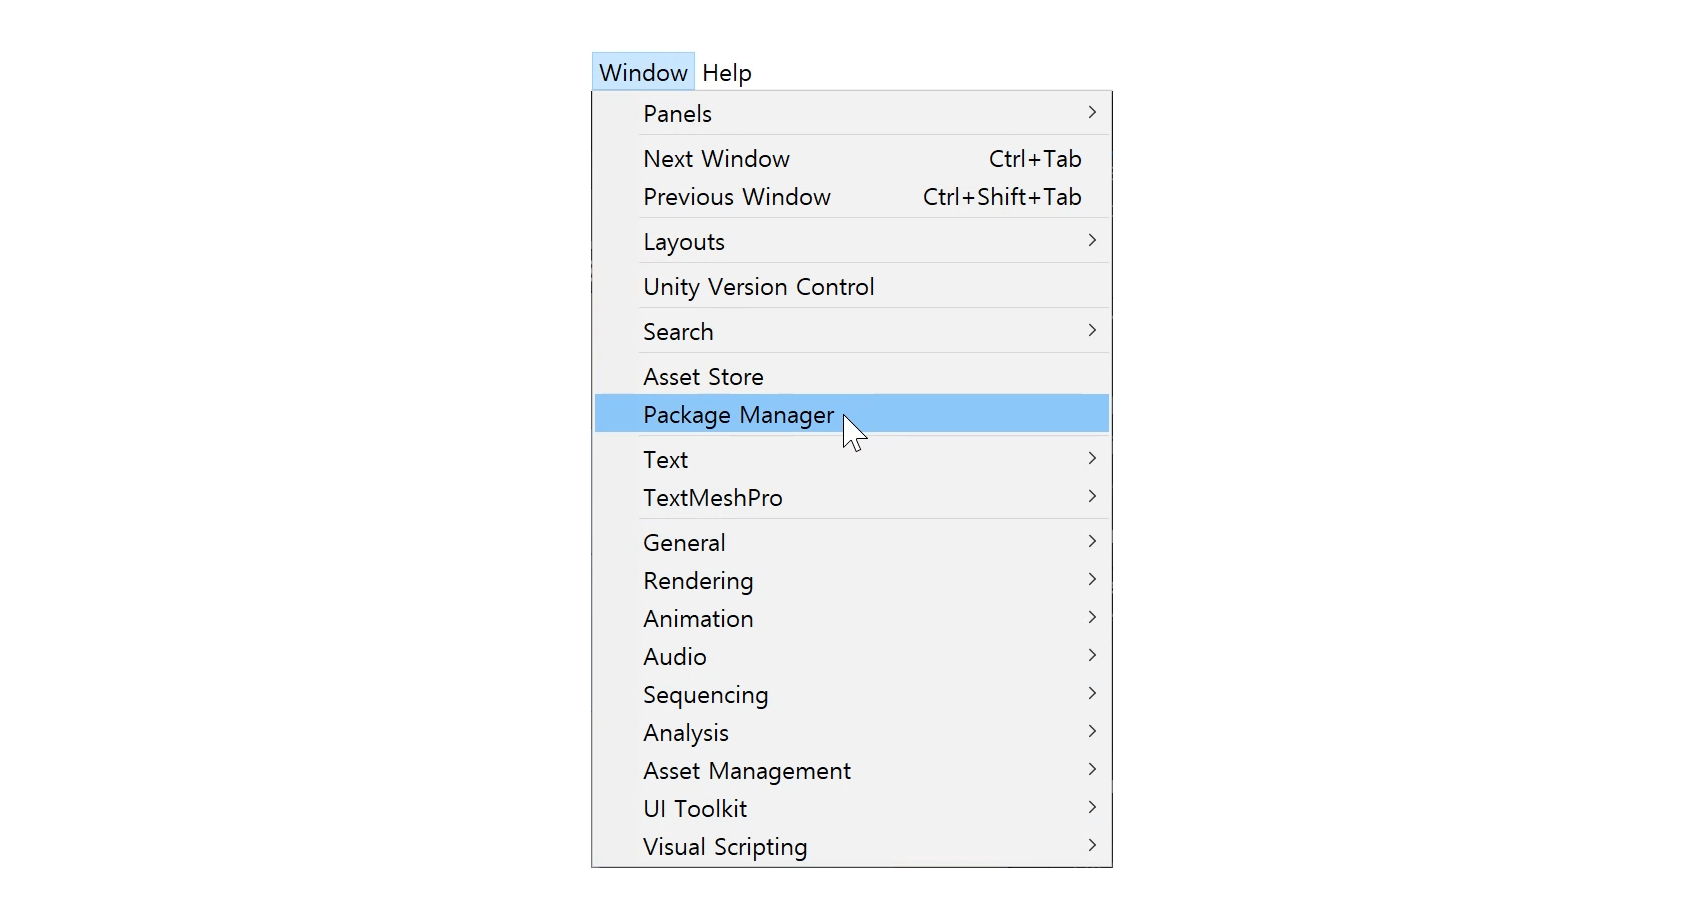
- Select Package: Unity Registry, then install the Input System.
- After installation, restart the project.
- Pen pressure has been enabled.
Apply the texture worked on in painting mode.
The painting mode of UModeler X uses a separate material designed for painting mode, allowing you to paint directly on the model you are currently working on. Therefore, to apply the image created in painting mode to the actual model, the following steps are necessary
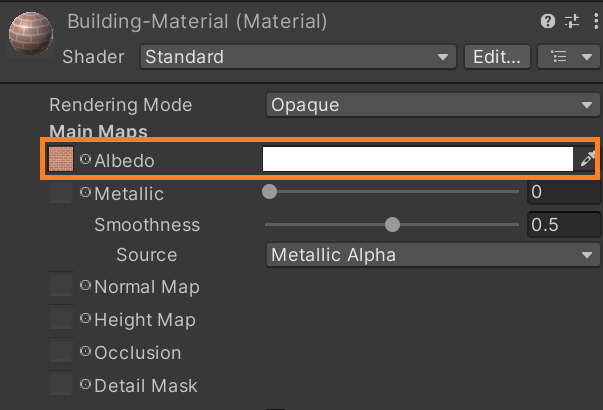
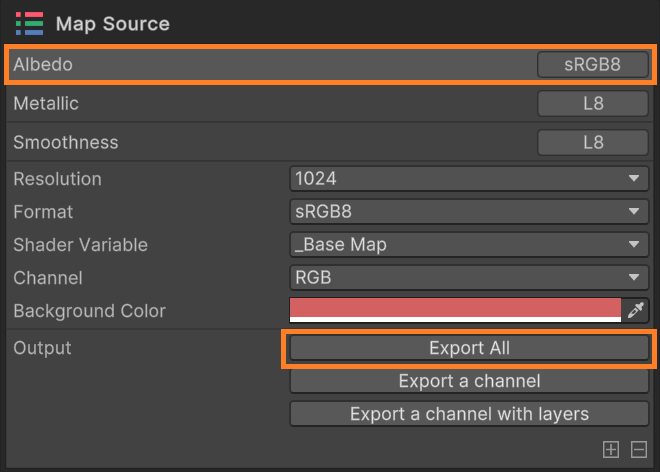
- Click the Export All button at the bottom of the Map Source group to export the results drawn on the selected Map Source as a .png file. In the image below, you can see the result colored on the Albedo map source being exported.
- Set the exported texture in the appropriate slots such as Albedo, Metallic, Normal, etc., of the material used in modeling mode. In the image below, it shows assigning the texture exported from painting mode to the Albedo map of the material.